
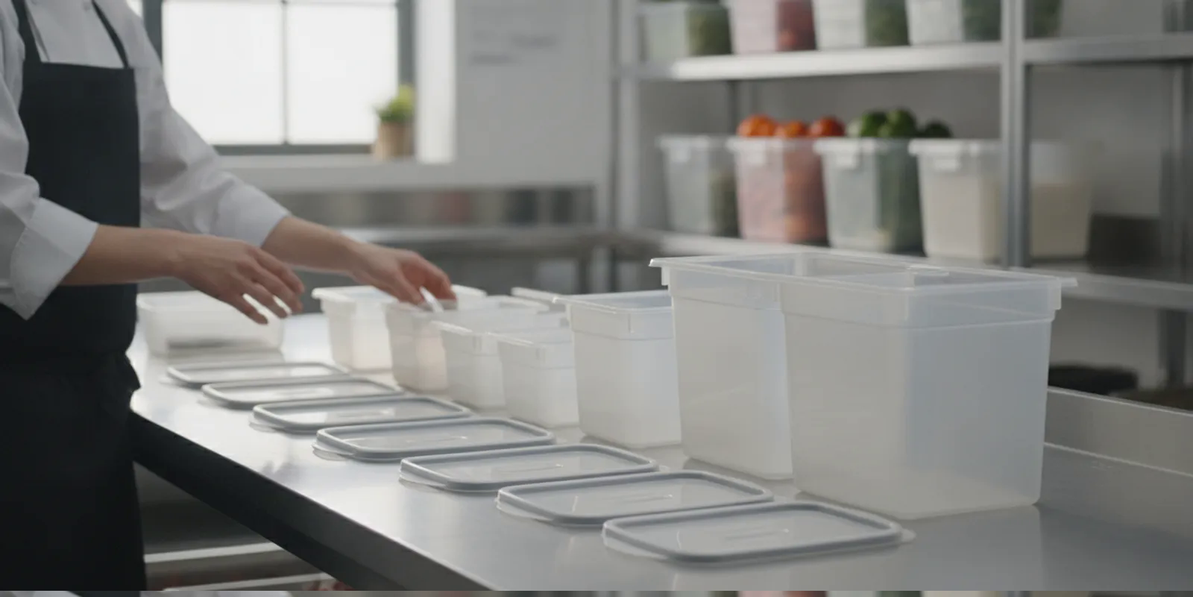
How Should Caterers Organize Food Storage Container Sizes and Lids?
Food storage containers are easier to manage when a catering team chooses sizes for defined jobs instead of adding formats without a plan. A clear system connects each container to prep, portioning, holding, or transport, then keeps its lid, label, and storage location consistent. Start with how food moves through your operation, and build a standard around the menu, space, and event routine.
Browse foodservice and facility supplies
What jobs should your container system cover?
List the work your team actually does, from receiving ingredients to event cleanup. A caterer may need containers for ingredient staging, batch preparation, portioning, chilled holding, service, leftovers, or delivery. Those jobs do not always call for the same shape, capacity, or closure. Define the use first, then select a format.
Walk through a typical event with someone who performs each step. Note where food is portioned, how it moves between work areas, whether it waits in storage before service, and what travels to the venue. Ask staff which containers are used every week and which stay untouched. Record the answers by task rather than by whoever happens to have ordered the last case.
- Prep: Choose a footprint and capacity that fit the ingredient quantity and the shelf or work surface.
- Portioning: Match capacity to a repeatable batch or portioning step so staff can find the right vessel without guessing.
- Holding: Confirm that the container and lid are appropriate for the planned storage conditions and use.
- Transport: Consider closure, stacking, stability, and how a filled container will be secured in transit.
Mark whether each format is reusable or disposable, and whether it is for back-of-house handling or event service. This distinction helps prevent a convenient prep vessel from being pulled into a transport role it was never selected to perform. It also clarifies which stock should be counted after an event and which should be replenished.
How do you standardize sizes around portions and batches?
Build a small size map based on recurring work. A practical system might assign one format to garnishes and small components, another to sides and prep ingredients, and a larger vessel to bulk preparation. Those are roles, not universal volume recommendations. Match the actual dimensions and capacity to your recipes, shelving, and service plan.
For each recurring menu item, write down the normal batch quantity and the container that holds it with room to close the lid without pressing food into the closure. If the food will be portioned later, avoid a vessel so oversized that staff must reach deeply or move it repeatedly during service. Conversely, a too-small format can force extra transfers and consume more lids, shelf space, and labor.
Test candidates with a representative amount of food or a safe stand-in volume. Check whether the quantity fits, whether staff can lift and handle the filled unit, whether it nests or stacks where intended, and whether the matching lid closes correctly. Repeat the test with the kinds of contents and handling involved in routine work; a dry ingredient and a prepared dish may behave differently in the same container.
| Container role | Example task | What to test | Stock-planning cue |
|---|---|---|---|
| Small | Garnishes, toppings, small ingredients | Does the working quantity fit and remain easy to identify? | Set a count from menu frequency and station use. |
| Medium | Prep components, sides, moderate batches | Does it fit the shelf and allow routine handling? | Track by prep station or menu group. |
| Large | Bulk prep or event quantities | Can staff move and store it securely when filled? | Tie the quantity to scheduled event volume. |
| Service or transport | Portioning or moving prepared food | Does the closure and footprint suit the route and packing plan? | Keep separate from back-of-house prep stock. |
Use this comparison as a planning template, not as a claim that one size suits every kitchen. The best system may use fewer formats than a supplier catalog offers. Fewer standards can simplify training, storage, and replenishment if they still fit the work.
Work a sample menu through the size map
Take a menu for one event and list each ingredient or prepared component, the quantity made, the stage at which it is packed, and its destination. Suppose the menu includes a garnish used at several stations, a side prepared in batches, and an entree packed for delivery. Assign each to a standard role, then check the real quantities against candidate capacities. If the same format serves two jobs without compromise, document that shared use. If it creates a poor fit for either task, keep the roles separate.
This exercise is also a useful way to spot uncommon formats. A container requested for one unusual event might be borrowed, rented, or ordered only when needed rather than added to the everyday standard. Let repeated evidence, not a single exceptional menu, drive permanent stock decisions.
How should lids stay matched to containers?
A base is useful only when staff can find the correct lid. Treat every base-and-lid combination as one stocked unit. Check compatibility before a repeat order, especially when product lines have similar shapes. Do not assume lids from different lines or manufacturers interchange just because they appear to fit.
- Give each approved format a short name or code that staff can recognize.
- Store lids beside the matching bases in a marked bin or shelf location.
- Keep lids stacked so the correct size is visible rather than buried under other formats.
- When receiving a new case, test a sample lid against its corresponding base before putting stock into general use.
- Remove damaged or mismatched pieces from active stock so the problem is found before service.
For disposable formats, record the base and lid as a paired purchase even when they are sold separately. Compare pack and case counts, then calculate the complete sets each order provides. If a case of lids contains a different number of pieces than a case of bases, an apparently adequate reorder can leave a surplus of one component and a shortage of the other.
Use a simple receiving check: confirm the product identifier, inspect the case count, fit one sample pair, and note any variation in the inventory record. Keep a photograph or written description only if it helps staff identify the standard; it should supplement, not replace, checking the actual product details. When a supplier substitution is proposed, pause before distributing it and test the new pairing under the conditions for which it will be used.
How do temperature needs affect your choice?
Select containers for their intended job and follow the product information for temperature limits, storage, and any heating or cooling directions. A vessel suited to cold holding is not automatically appropriate for reheating. Before approving a format, verify the manufacturerâs stated use and make sure it fits the kitchenâs actual process.
Keep storage organization distinct from food-safety procedures. A container does not replace the operationâs requirements for temperature control, handling, sanitation, or event compliance. The Los Angeles County Department of Public Healthâs community event organizer requirements address food vendors and event provisions, including backup food storage. Caterers should check the requirements that apply to their own event and jurisdiction rather than treat one local document as a universal rule.
For microwave or other specific-use claims, rely on the exact product information and directions, not appearance or a general assumption about material. For example, the listing for Earthchoice Smartlock hinged-lid containers identifies a particular product format. Check its current specifications and intended use before adding it to a standard. Product-specific directions govern; a name or general category is not a substitute for the listing.
How can labels and storage locations reduce mix-ups?
Set a labeling routine that makes contents and timing clear to the people handling the food. Use the information your operation requires, such as item name, preparation or opening date, and responsible station. Follow applicable rules and your organizationâs procedures for labeling and holding. Choose a label method compatible with the container surface and expected storage conditions.
Agree on a consistent location for each standard size. Keep frequently used prep formats close to the prep area, reserve a separate zone for transport supplies, and mark shelves or bins with the format name. Put lids in the matching location. When everything has a home, a staff member is less likely to substitute a near-match simply because the correct size is hard to find.
Measure the shelf depth and height, door openings, carts, and vehicle storage area before buying a new format in quantity. A container may hold the right amount but still be awkward if it cannot fit available space or be moved comfortably when full. Test handling with staff and consider the route from cold storage or prep to the point of use. If access is tight, revise the location or format before making it routine.
Use a station-level reset checklist
At the end of prep or service, return containers to their assigned locations and reunite lids with the right format. A short reset can ask staff to remove damaged pieces, return unused disposable stock to its marked bin, update counts after a large event, and flag any format that ran short. Keep the checklist limited to actions that help the next shift start with usable, identifiable stock.
When several teams share a storage room, use the same names on shelf labels, purchase records, and packing lists. Avoid informal names that differ by station. One teamâs âsmall squareâ may mean something different to another, while an approved code linked to dimensions and a product description is easier to verify.
How should caterers plan for transport and event service?
Map the route from the kitchen to the serving location. Decide which foods remain in their storage vessels and which transfer to separate serviceware. Choose transport formats based on the actual route, stacking plan, and handling needs. Keep lids secured as intended by the product design, and use suitable secondary containment or transport equipment when the operation calls for it.
Plan a packing sequence as well as a container count. For example, list the destination station, item, format, quantity, and packing order. If several components must arrive together, group them by destination rather than by container size alone. This makes unloading more predictable and reduces the need to search through stacks at the venue.
Before loading, check that each container is labeled, closed as intended, and placed in a stable position. Consider whether filled units will be stacked, carried by hand, put on a cart, or secured in a vehicle. Do not assume a lid alone makes a load spillproof or suitable for every transport condition. The product design and the operationâs transport plan should both support the use.
After service, count reusable containers separately from disposable supplies and record losses or damage. Note which formats were too large, too small, or difficult to access. These observations turn each event into useful purchasing information. They also help distinguish a genuine shortage from a packing error or a format that was available but stored in the wrong place.
How do you turn the size plan into a case-buying routine?
Use observed consumption to set purchasing levels. Review upcoming events, menu plans, and recent usage to estimate the number of complete sets needed. For reusable containers, account for the rotation required while pieces are in use or being washed. For disposable formats, estimate sets per event and compare that need with the case pack. Set a reasonable buffer from actual variation rather than guesswork.
- List approved standards: Record format, role, dimensions or capacity, and its matching lid.
- Estimate demand: Use the event calendar and normal recipes to calculate expected use by format.
- Set a reorder point: Choose a minimum stock level that gives the buyer time to replenish before the next planned use.
- Check units: Compare each, pack, and case quantities for both bases and lids.
- Confirm storage: Make sure the planned case quantity fits receiving and storage space.
- Approve substitutions: Test alternatives for fit, closure, shelf space, and intended use before changing the standard.
A spreadsheet can track the format, application, approved product, lid match, case quantity, on-hand count, reorder point, and location. Add an owner for the record so someone updates it when an item changes. For a small kitchen, a printed list may work just as well. The key is that buyers and staff use one current reference rather than separate notes that drift apart.
Consider a worked case. An event uses two standard formats and each is packed with a matching lid. The buyer starts with the expected number of sets per event, multiplies by the number of events before the next replenishment, then checks how many complete sets the product case quantities supply. If bases and lids have different case counts, calculate them separately and buy to the smaller available set count. Record any leftover pieces and use them in the next calculation. This is more reliable than ordering the same number of cases for every component.
For a product comparison, review the janitorial and facility supply catalog and the specific hinged-lid container listing. Compare documented dimensions, case quantity, lid arrangement, and stated intended use against the standard your team approved. Do not select by name alone.
What should you review before approving a new format?
Run a short trial with the people who prep, store, pack, and serve food. Use a representative menu item, try the matching lid, put the container on the intended shelf or transport setup, and observe how it fits the workflow. Ask staff whether the format is easy to identify, carry, stack, and access. A small test can reveal a mismatch before an entire case becomes routine stock.
- Does the volume suit a real recipe, batch, or portioning task?
- Can staff identify it and find the matching lid quickly?
- Does the format fit its storage position and transport arrangement?
- Are the stated use directions clear for the intended process?
- Do case quantities provide enough complete sets without creating excess stock?
- Can the item be included in the existing labeling, count, and reorder routine?
After the trial, document the decision: approve, reject, or test again with a specific adjustment. If approved, update the product record, shelf label, lid match, and packing list at the same time. Remove obsolete names and instructions so staff do not continue using conflicting standards. If rejected, note the reason; that prevents the same unsuitable option from being reconsidered without new evidence.
How can teams troubleshoot common container problems?
When a problem occurs, trace it to the stage where it began rather than adding another size immediately. A lid shortage may come from mismatched case quantities, lids stored separately, or a receiving error. A crowded shelf may indicate that the case par is too high, that formats are not nesting as expected, or that a rarely used size has no defined home. A transport issue may be a packing or route problem rather than a capacity problem.
| Observed problem | Check first | Practical adjustment |
|---|---|---|
| Staff cannot find the right lid | Storage location, labels, compatibility, receiving count | Pair and mark stock; verify the next case before shelving. |
| Format is often unused | Menu frequency and event records | Reduce par or make it a special-order format. |
| Containers do not fit shelf space | Actual dimensions and stacking orientation | Reassign location or test a better-fitting standard. |
| Shortage during an event | Forecast, case-pack math, and packing count | Revise the estimate using actual event usage. |
Review these notes at a set interval, such as during routine purchasing review or before a busy event period. Look for repeated issues. One isolated mistake may need a reminder; a repeated issue usually calls for a change to the location, training, product record, or reorder level.
Review the hinged-lid container details
Frequently Asked Questions
How many container sizes should a catering team standardize?
There is no single correct number. Start with the fewest formats that cover recurring prep, holding, portioning, and transport tasks. Add another size only when a documented use cannot be handled well by an existing standard.
Can lids from different container lines fit each other?
Do not assume they will. Check the product specifications and test the exact base-and-lid combination before buying it as a standard or using it in routine service.
Should the same container be used for prep and event transport?
Only when the format and its stated directions support both jobs. Consider the route, closure, handling, storage, and whether the food transfers to separate serviceware.
What should a container inventory record include?
Record the format, role, product description, lid match, case quantities, on-hand count, reorder point, and storage location. Add relevant use directions and labeling notes so staff can follow the standard consistently.
A written size-and-lid standard gives buyers a repeatable way to replenish stock and gives the team a clear routine for choosing, storing, labeling, and moving each container for its intended job.
Recent Posts
-

How Should Caterers Organize Food Storage Container Sizes and Lids?
Food storage containers are easier to manage when a catering team chooses sizes for defined jobs ins …Nov 5th 2026 -

How should multi-site workplaces audit first aid supply replenishment?
First aid supplies are easier to manage across several workplaces when teams use the same audit proc …Nov 4th 2026 -

How should a business write a powder-free glove purchasing standard?
A clear purchasing rule helps teams choose powder free gloves consistently instead of selecting a bo …Nov 3rd 2026