
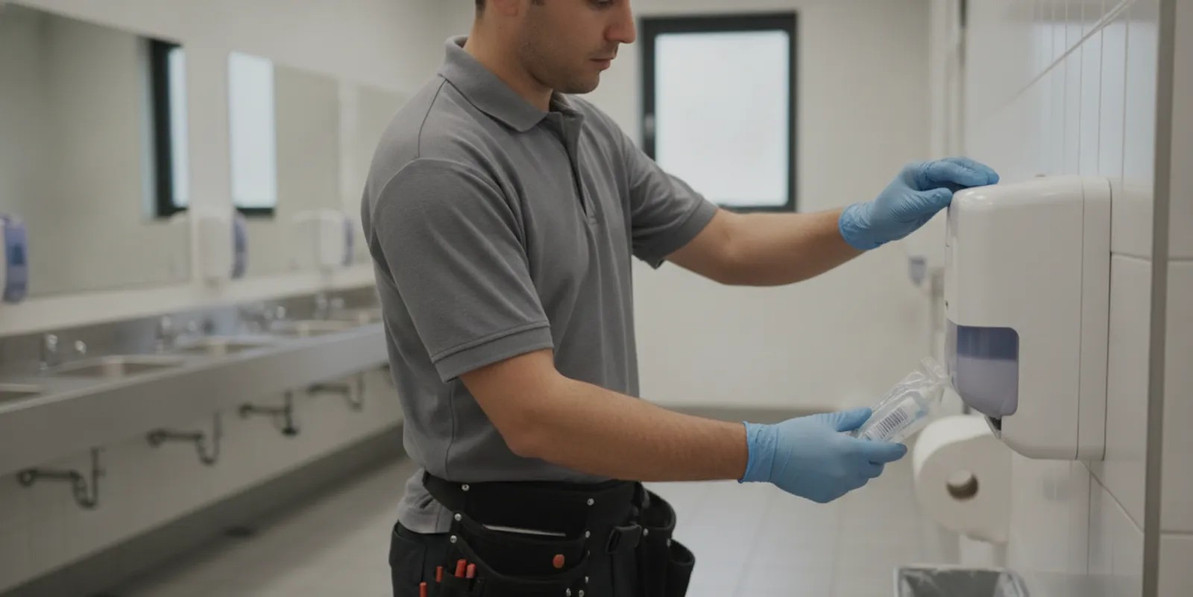
How to Refill Soap Dispenser Systems: Commercial Step-by-Step Guide
Knowing how to refill soap dispenser systems correctly helps keep commercial restrooms ready for use and avoids wasted product or a dispenser that will not work. The first step is to identify the dispenser’s refill format: many wall-mounted units use a sealed cartridge, while others have a reservoir filled from a bulk container. These systems are not interchangeable, so check the dispenser label and the refill instructions before opening anything.
Explore facility dispenser products
Identify the dispenser and refill format first
Start by looking at the front, underside, and inside of the dispenser for a brand, model number, refill code, or instructions. If the unit is locked, use its key or release method as directed by its manufacturer. Do not pry the cover open. A broken latch can leave the dispenser difficult to secure or clean.
Next, determine how soap enters the unit. A cartridge dispenser takes a purpose-made container that usually connects to a pump or nozzle as a single assembly. A bulk-fill dispenser has an open reservoir into which soap is poured. A counter-mounted bottle or pump may have a removable bottle or screw-top refill. Check the label or manual to confirm which format applies. Similar-looking dispensers can require different refills, and a container that fits the opening is not necessarily compatible with the pump.
Record the model and refill information before ordering supplies, especially when maintaining several washrooms. A photo of the label and the current container can help a purchasing team compare the correct item. Browse Bobrick products or Impact products as part of checking facility product options; confirm the exact dispenser and refill specifications before purchase.
For a consistent check, note four details: dispenser brand and model, refill code or container type, soap format named in the instructions, and any special installation or priming direction. Keep the information with the restroom or equipment record rather than relying on memory. If the dispenser is an older model and the label is worn, compare the pump and container with the manufacturer’s documentation before ordering. A photo can show the mounting shape and connection, but it cannot replace a part number or written compatibility check.
When staff service several locations, use one record per dispenser rather than one general entry for the building. A restroom may contain more than one model after repairs or renovations. A small label on the inside of a maintenance log, or a shared inventory sheet, can connect a dispenser ID with its matching refill. This also helps a substitute employee avoid treating a cartridge unit as a bulk-fill reservoir.
Compare common refill methods
The steps depend on the design. Use this overview to identify the method, then follow the instructions printed on the specific dispenser and refill. If the refill type is unclear, pause rather than forcing a container into place or pouring soap into an unknown opening.
| Dispenser format | Typical refill method | Key compatibility check | Important handling point |
|---|---|---|---|
| Sealed cartridge | Remove the depleted cartridge and install a new one as directed | Match the cartridge code, size, pump, and dispenser model | Do not open or pour from the cartridge unless the manufacturer directs it |
| Open reservoir | Open the reservoir, service it as directed, then fill with the specified soap | Confirm the soap type and viscosity are permitted for that unit | Do not top off or mix with soap left in the reservoir; follow the manufacturer’s cleaning and refill directions |
| Removable bottle or countertop pump | Remove or open the bottle and replace or refill it as designed | Check bottle threading, pump fit, and soap instructions | Keep the container and pump clean and secured after service |
Use the table to sort out the method, not to override the product instructions. For example, a dispenser with a removable inner container may still use a sealed refill rather than accept poured soap. Before a service round, check whether the replacement is a full cartridge, a bottle intended to be swapped, or bulk product for a reservoir. Keeping those supplies separate on a cart reduces the chance of opening the wrong container at the fixture.
How to replace a sealed soap cartridge
- Gather the right refill. Match the dispenser’s manufacturer and model or refill code. Compare the package information with the label inside the unit. Check that the container is intended for that dispenser, rather than relying on appearance alone.
- Prepare the work area. Keep the replacement cartridge clean and within reach. If a disposable towel or gloves are part of your facility procedure, have them ready. Avoid touching the soap outlet or pump connection with dirty hands.
- Open the cover as designed. Use the key, button, or release mechanism specified for the dispenser. Support the cover as it opens. If it resists, check for a lock or a different release point instead of pulling harder.
- Remove the depleted cartridge. Follow the manufacturer’s direction for releasing it. Some assemblies lift out or unclip; others attach at the pump. Do not twist or pull on tubing, valves, or parts that are not intended to detach.
- Check the dispenser interior. Wipe visible drips from accessible surfaces with a clean cloth according to your facility’s cleaning procedure. Do not immerse the dispenser or apply a cleaning chemical to the pump unless the instructions allow it.
- Install the new cartridge. Orient the container as shown by the dispenser markings. Press or secure it into place until the connection is seated. Avoid puncturing, cutting, or opening a sealed container unless the refill instructions call for that step.
- Close and test. Shut the cover and lock it if applicable. Place a hand under the nozzle and operate the dispenser several times, as instructed, until soap flows. Check that the cartridge remains seated and that soap is not leaking around the connection.
If the new cartridge does not connect easily, stop and recheck its model and orientation. Forcing a nearly compatible cartridge can damage the pump or prevent a proper seal. Keep the old refill packaging until the dispenser works, so the item code is available if you need to check the match.
A practical example: if a replacement cartridge appears to fit but the cover will not close, do not remove a tab or press harder to make it latch. Recheck the refill code and make sure the old cartridge or a loose component has been fully removed according to the instructions. Then compare the new container’s orientation with the dispenser diagram. If the code matches but the pump connection still does not seat, set the refill aside and inspect the dispenser for a damaged connector. This simple pause prevents a hurried repair from turning into a leak or a unit that cannot be locked.
How to refill an open-reservoir dispenser
Open-reservoir systems need more care than a sealed cartridge system. Soap left in a reservoir can remain there between service visits, and adding fresh product on top can mix old and new material. The CDC warns that refilling or topping off liquid soap containers has been associated with outbreaks of pathogenic bacteria and advises against adding soap to containers in ways that create this risk. Follow the dispenser maker’s procedure and your facility’s hygiene policy; do not treat a bulk-fill reservoir like a sealed cartridge.
Research has also examined contamination in bulk-refillable soap dispensers. The findings are a reason to take the refill system and cleaning instructions seriously, not a reason to assume that every dispenser or soap is contaminated. See the study on contamination in refillable soap dispensers and the CDC’s clinical hand-hygiene safety guidance.
When the manufacturer specifically permits refilling a reservoir, use its instructions for emptying, cleaning, drying, and refilling. The exact process differs by unit. A general service sequence is:
- Verify the permitted product. Check the dispenser label or instructions for the soap type and any limits on formulation or viscosity. Do not substitute a different soap just because it is available.
- Protect the opening. Place the bulk container on a clean, stable surface. Keep its cap, spout, and the reservoir opening free from contact with the sink, counter, or hands that have handled waste.
- Empty and clean only as directed. Do not pour new soap over remaining product. If the instructions call for cleaning, use the specified method and allow components to dry as directed before refilling. If you cannot perform the required cleaning procedure, consult the facility lead or replace the dispenser with an approved refill system.
- Refill without overfilling. Pour carefully to the fill line or level stated by the maker. Avoid spills on the pump, wall, and counter. Do not add water, fragrance, or another soap unless the instructions explicitly permit it.
- Close, label, and test. Secure the cover and mark the service date if your site tracks refill work. Operate the dispenser to check for flow, then inspect for drips and a properly closed reservoir.
Where guidance is missing, do not invent a cleaning method or assume a refillable unit can be topped off. Ask the dispenser manufacturer or your facilities supervisor for the approved procedure. For high-traffic or healthcare environments, use the site’s hand-hygiene policies and approved equipment requirements.
Build enough time into the maintenance round to complete the directed cleaning and drying steps. If a reservoir requires a longer drying period, do not shorten it just to return the dispenser to service quickly. Use an approved alternate dispenser or follow the site’s temporary-service plan while the component dries. Likewise, do not use a container that has been left open or whose contents or label cannot be verified. A written procedure makes it easier for multiple staff members to follow the same sequence and report when a dispenser needs a different maintenance approach.
Choose and handle soap with the label in view
The dispenser and the product label work together. Confirm the soap is intended for the specific dispenser format and use. A product intended for a different pump, cartridge, or application may not dispense as expected. Avoid pouring products together or diluting them to make them fit. Check the container for handling directions and any warnings, and keep the label accessible for staff who service the unit.
Separate product selection from refill technique. This guide does not identify one formula as suitable for every dispenser. Compare the product and dispenser documentation before ordering, and keep the refill description or item number with the location’s supply records. Discount Janitorial Supply carries a broad range of facility and janitorial products; buyers can review Betco products and Dymon products as appropriate to their purchasing needs, while verifying compatibility and instructions for each specific item.
When comparing a replacement, check more than the product name. Confirm whether the instructions specify a liquid or foam format, a cartridge or bulk container, and a particular pump assembly. Check pack details and the refill code against the unit’s requirements. If a purchasing team is ordering for multiple buildings, keep approved product records tied to the relevant dispenser models rather than assuming a single soap works everywhere. This is a practical procurement safeguard, not a claim that one soap type is better for all facilities.
Clean and inspect the dispenser during service
A refill visit is also a practical time to look for simple maintenance issues. Use the manufacturer’s directions and your facility’s cleaning procedure. Wipe exterior drips, remove residue from accessible surfaces, and keep the nozzle unobstructed. Do not submerge an installed dispenser or use an abrasive tool on the pump unless the instructions say it is safe.
- Check that the cover closes and locks correctly.
- Look for cracks, loose mounting, broken tabs, or a reservoir that does not sit securely.
- Inspect the nozzle for dried residue or blockage, without inserting sharp objects.
- Check the wall and counter for leaks, splashes, or soap buildup.
- Confirm the installed refill is labeled and seated in the expected direction.
- Record the service date or product code if the site tracks usage and maintenance.
For multi-stall or multi-site operations, a short service log can make recurring issues easier to spot. Record the restroom or dispenser identifier, refill type, date, and any problem found. This is useful when staff rotate or several people order supplies. It also helps distinguish a dispenser fault from an incorrect refill or a routine restocking delay.
Use the same basic inspection order each time: verify the refill and connection, check the pump and nozzle, inspect the housing and mounting, then wipe the surrounding surfaces under the facility procedure. If the unit is loose, cracked, or leaking, record its location and take the appropriate maintenance action rather than leaving an unresolved fault for the next shift. For a team, a brief checklist with a space for “no issue,” “refill needed,” or “repair needed” is more actionable than a note that simply says the restroom was serviced.
Troubleshoot common refill problems
The dispenser does not dispense after a cartridge change
First confirm that the cartridge matches the model and is installed in the correct orientation. Check for a shipping seal or activation step only if the refill instructions mention one. Close the cover fully, then prime the pump according to the dispenser instructions. If the pump still does not work, inspect for a jam, damaged pump, or misaligned connection. Do not force the mechanism or cut into the refill.
The pump works, but soap comes out slowly
Check that the approved soap is being used and that the refill is seated properly. Look for a blocked nozzle or a pump that needs service under the manufacturer’s procedure. A product that does not match the dispenser specification may contribute to poor flow, but do not assume the cause without checking. Replace or clean parts only as directed.
Soap leaks after refilling
Stop using the dispenser until the leak is addressed. Check whether the cartridge is fully connected, the reservoir cap is secure, and the fill level is within the stated limit. Clean the spill using your facility procedure and protect the surrounding floor from a slip hazard. If a seal, bottle, or housing is damaged, take the unit out of service and follow your maintenance process.
The refill will not fit
Compare the item code, container shape, pump connection, and dispenser model. Do not trim a cartridge, transfer its contents, or modify the dispenser to make it fit. Set the incorrect item aside and confirm the correct refill with the manufacturer’s documentation or supplier before installing it.
The dispenser works intermittently
Note whether the problem occurs after each use or only when the refill is low. Check that the refill remains seated, the cover is latched, and nothing is obstructing the pump’s movement. If the unit uses batteries or a powered sensor, follow its manual for the relevant check rather than assuming it is a soap-flow issue. Record what you observe and when it happens. Repeated intermittent operation may require maintenance or replacement under your facility process.
When troubleshooting, change one thing at a time and retest. For instance, first confirm the cartridge code and seating; then check the cover and prime the dispenser as directed. If several adjustments are made at once, it can be harder to identify whether a wrong refill, an installation issue, or a damaged pump caused the fault. Do not dismantle components that the instructions identify as sealed or non-serviceable.
Plan refills to reduce downtime and ordering errors
For a single restroom, keeping one correctly matched spare may be enough to avoid an empty dispenser while a refill is ordered. For a facility with multiple washrooms, build a simple inventory list by location and dispenser model. Include the refill code, type, approximate reorder point, and person responsible for checking stock. Avoid standardizing on one refill across the building until you have confirmed each dispenser’s requirements.
During a supply review, group compatible items by location and order unit, then compare case quantity with actual usage and storage capacity. The goal is to have the right refill available without tying up space in products that do not fit the installed equipment. For related restroom restocking, review Kleenex products and Papernet products alongside soap supplies, and verify the exact product details before placing a purchase order.
Same-day shipping applies to most items, and East Coast delivery is generally 1–3 days; timing can vary by item and destination. If you are ordering a replacement refill, allow time to verify the model and product code rather than relying on a last-minute visual match.
A straightforward reorder routine can start with a weekly or shift-based walk-through, depending on how often the restrooms are used. Staff can mark low or empty units, but the person placing the order should check the model and refill code against the inventory record. For a new location, first record every dispenser before setting stock levels. Then observe usage across normal operating periods and adjust the reorder point based on the site’s actual experience. This avoids choosing a case quantity from guesswork or copying another building’s par level when its dispenser types and usage differ.
Keep reserve stock in a clean, dry, designated area and leave product labels visible. Separate cartridges from bulk containers and organize them by the dispenser model or refill code. When a product is discontinued or equipment is replaced, update the record and use the approved purchasing process to prevent old and new refills from being confused. A periodic count of on-hand refills, open packages, and dispensers in service helps identify a mismatch before an empty unit forces an urgent substitution.
Review facility dispenser products
Frequently Asked Questions
Can I pour new soap into a partly full dispenser?
Do not top off an open reservoir unless the specific dispenser instructions explicitly permit the procedure. CDC guidance cautions about refilling or topping off soap containers because it has been associated with contamination concerns. Use the manufacturer’s specified emptying, cleaning, and refill process.
Can I use any soap that fits the reservoir?
No. Check the dispenser label and product instructions for compatible soap and refill format. A product fitting the opening does not establish that it is intended for that pump or unit.
Should I clean a dispenser every time I refill it?
Follow the dispenser manufacturer’s maintenance instructions and your facility’s procedures. Open-reservoir equipment may have a cleaning process that differs from replacing a sealed cartridge. Do not use an improvised cleaning method or mix new soap with leftover product.
What should I do if a replacement refill will not fit?
Stop and compare the item code and dispenser model. Do not force, cut, or transfer the refill. Check the manufacturer’s documentation or ask your supplier to help confirm the correct item.
Correct refilling starts with identifying the dispenser, matching the specified refill, and following its maintenance instructions. A simple model-and-refill record helps keep commercial soap dispensers working and makes future restocking more reliable.
Recent Posts
-
How should facilities plan feminine care products for restrooms?
Planning feminine care products for a commercial restroom means more than choosing what to stock. Fa …Oct 21st 2026 -

How to Refill Soap Dispenser Systems: Commercial Step-by-Step Guide
Knowing how to refill soap dispenser systems correctly helps keep commercial restrooms ready for use …Oct 21st 2026 -

Bulk Hand Soap Commercial Buying Guide for Facilities
Commercial hand hygiene is not a single-product purchase. Facility managers, building service contra …Oct 21st 2026